For the complete documentation index, see llms.txt. This page is also available as Markdown.

Alation Integration

Telmai integrates with Alation to push data quality results directly into your Alation data catalog. The integration is one-directional: Telmai sends results to Alation, not the other way around.

Once an asset is mapped, Telmai automatically pushes updated data quality results to Alation after every completed scan of that asset — no manual sync is required.

Overview

Setup involves steps in both platforms:

Platform
What you do

Alation

Create a custom Rich Text field named Telmai Observability, generate a Refresh API Token, and note your numeric user ID

Telmai

Connect to Alation using the token, then map Telmai assets to Alation tables


Step 1: Prepare Alation

Create the Custom Field

Telmai writes results into a Rich Text custom field in Alation. The field must be named exactly:

Telmai Observability

Create this field in Alation under Settings > Customize Catalog > Custom Fields and attach it to the Table object type.

Generate a Refresh API Token

Telmai authenticates to Alation using a Refresh API Token tied to a specific user account.

To generate one in Alation:

  1. Sign in as the Alation user account Telmai will use

  2. Click your user avatar in the upper right and select Account Settings (called Profile Settings in some versions)

  3. Open the Authentication tab

  4. Click Create Refresh Token, give the token a name, and click Create Refresh Token again

  5. Copy the Token Secret Key shown — this is the value you will paste into Telmai

For full details, see Alation's guide on generating API tokens.

Find Your User ID

Telmai also needs the numeric Alation user ID of the account that owns the token. This is a number (for example, 81) — not the login username or email address.

The quickest way to find it: open your own profile page in Alation and look at the browser address bar — the number at the end of the URL is your user ID:


Step 2: Connect Telmai to Alation

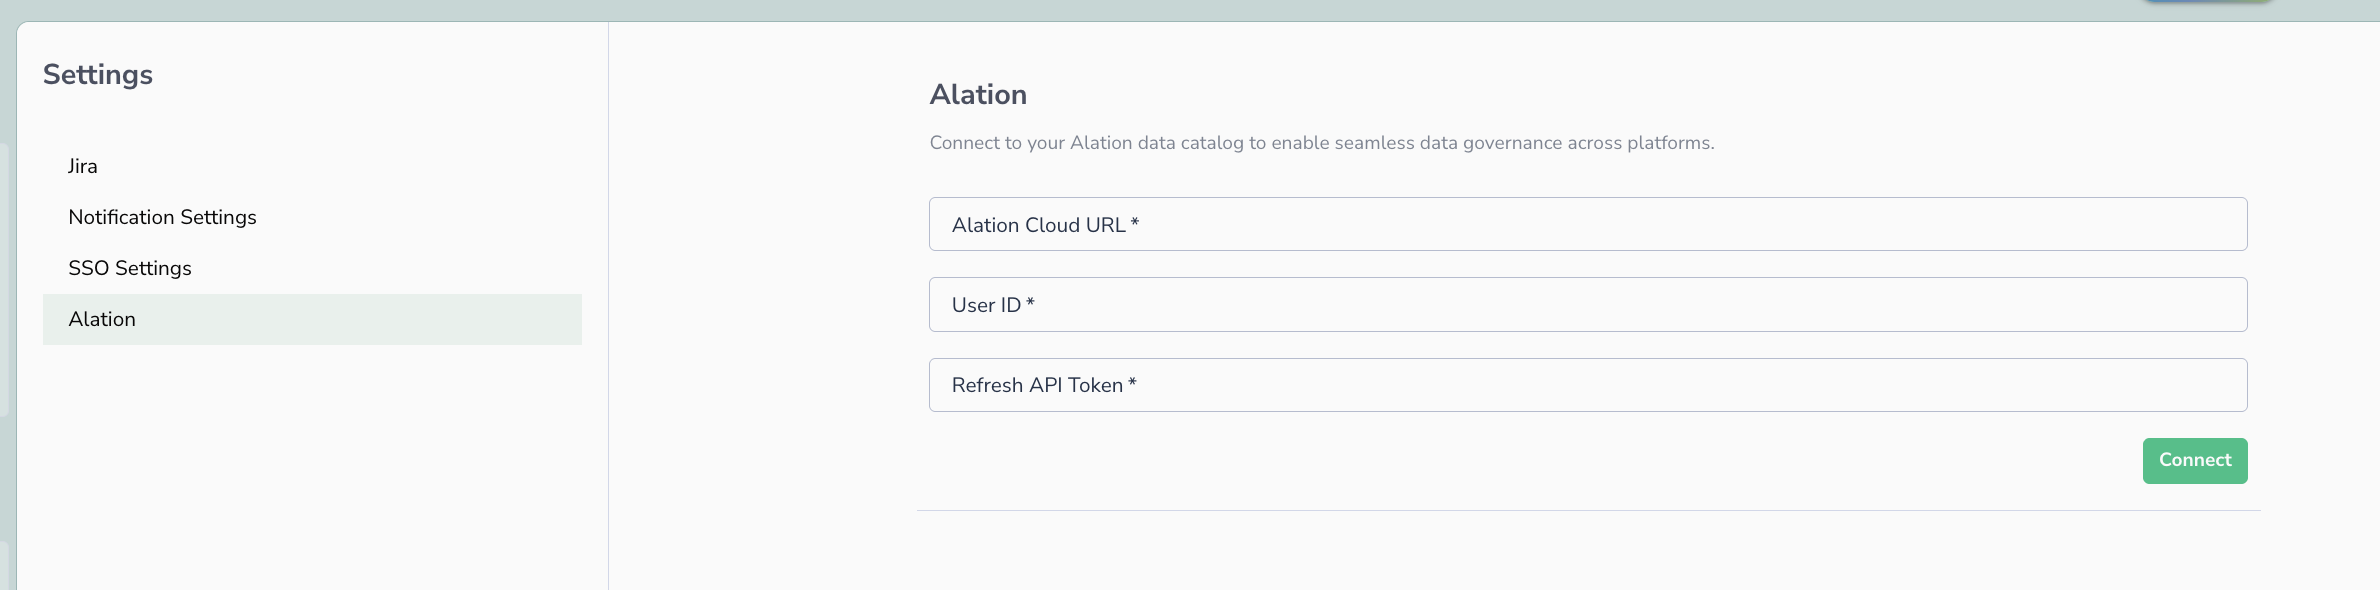
In Telmai, go to the Administration page and open Settings > Alation.

Alation settings panel in Telmai Administration showing fields for Alation Cloud URL, User ID, and Refresh API Token
The Alation connection form under Administration — enter your Alation URL, User ID, and Refresh API Token, then click Connect.
Fill in the three fields using the values from Step 1:

  • Alation Cloud URL — the base URL of your Alation instance (e.g., https://your-org.alationcloud.com)

  • User ID — the numeric Alation user ID (not the login username or email)

  • Refresh API Token — the Token Secret Key you copied when creating the token

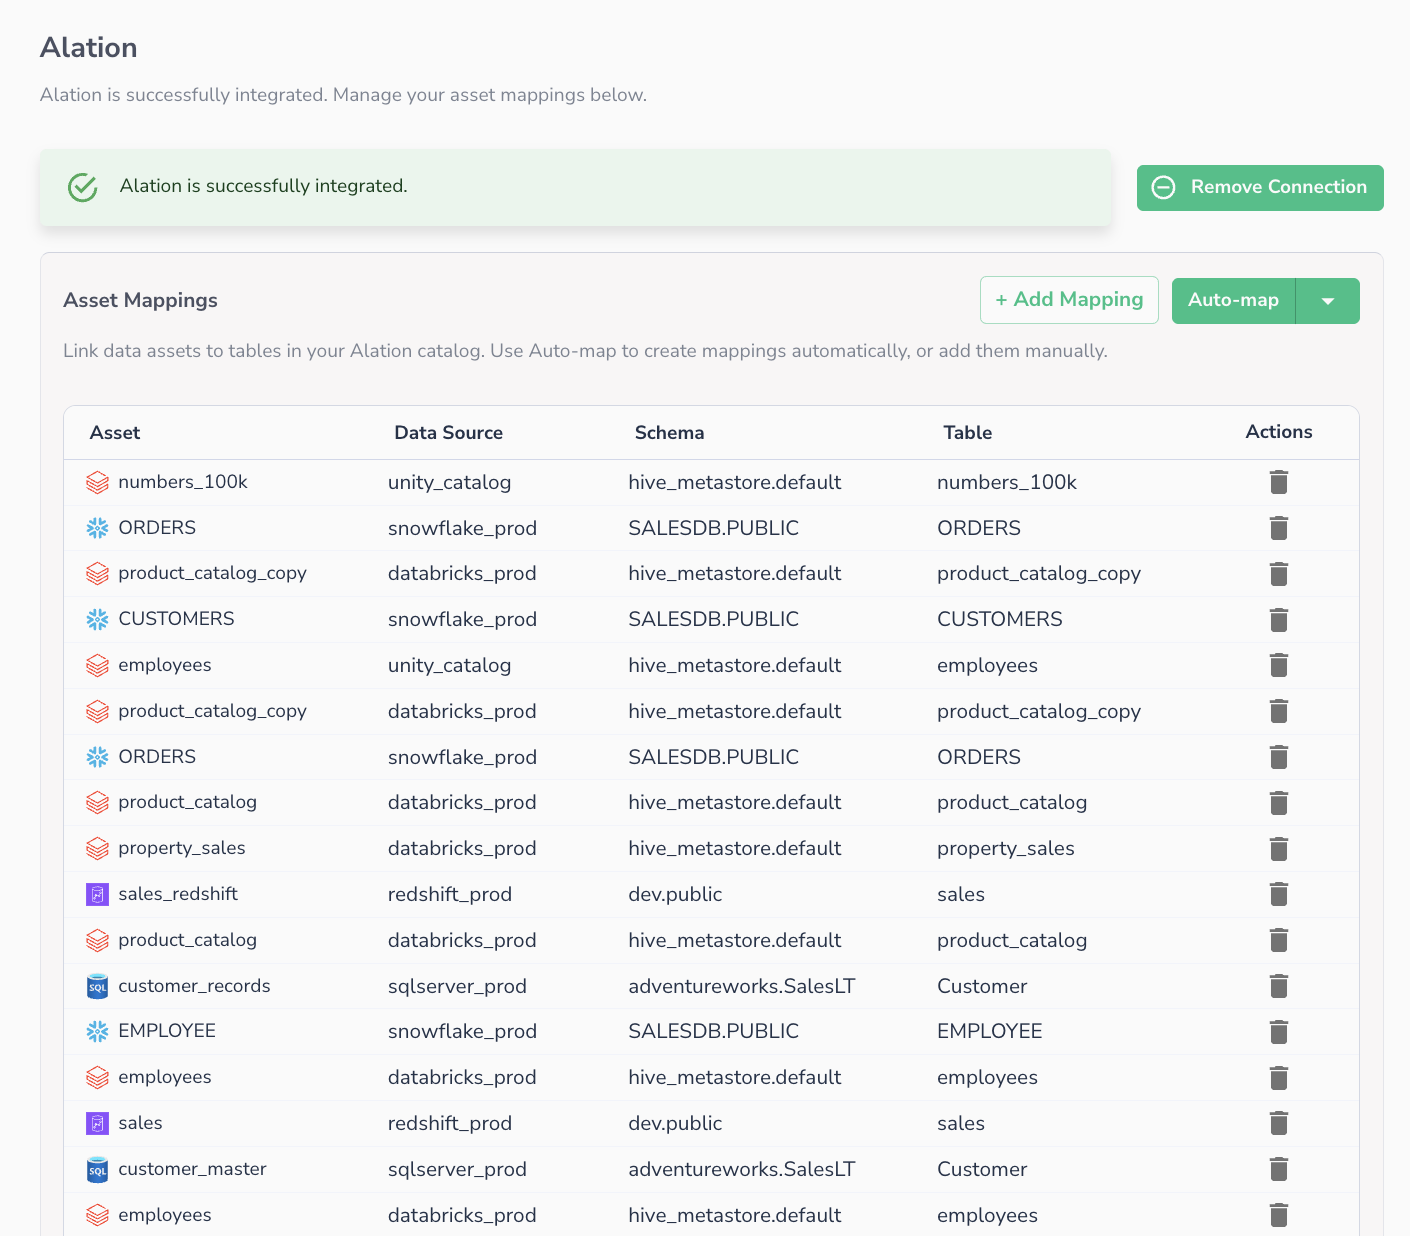
Click Connect. Once the connection succeeds, the panel shows an Alation is successfully integrated confirmation, and an Asset Mappings section appears below it (used in Step 3).

The connection can also be managed via API — see Add or Update Integration.

Modifying or Removing the Integration

To update the integration, enter new credentials in the same panel and reconnect. To remove it entirely, click Remove Connection in the same panel or call the Remove Integration endpoint.


Step 3: Map Assets

Data mappings link Telmai data assets to their corresponding tables in Alation. Without a mapping, Telmai cannot write quality results to the correct catalog entry.

Mappings are managed from the Asset Mappings section of the Settings > Alation panel, which appears once the connection from Step 2 is established. All mapping operations are also available via the Alation Integration APIs.

Asset Mappings section in Telmai showing the Add Mapping and Auto-map buttons and a table of existing mappings with columns for Asset, Data Source, Schema, Table, and Actions
The Asset Mappings section — use Auto-map or + Add Mapping to create mappings; each row links a Telmai asset to an Alation table.

Telmai scans both platforms and creates mappings automatically by matching Telmai assets to Alation tables.

Click Auto-map to start the mapping job. By default, existing mappings are kept; use the dropdown next to the button to overwrite them instead. The job runs in the background — via API, the Start Automatic Mappings endpoint returns a job_id for tracking progress.

To check on a running or completed job via API, pass the job_id to Get Mapping Job Result. On completion, the result lists each new mapping with its Telmai asset ID and the matched Alation data source, schema, and table (IDs and names).

Manual Mapping

To control mappings individually, click + Add Mapping and pair a Telmai asset with the corresponding Alation table. Via API, use Create a New Mapping Manually with the Telmai asset ID and the Alation table ID.

Managing Mappings

Existing mappings are listed in the Asset Mappings table, showing each Telmai asset alongside its mapped Alation data source, schema, and table. To remove a mapping, click the delete icon in its Actions column, or call Delete a Mapping with the Telmai asset ID.


Step 4: Verify the Integration

To confirm everything is wired up:

  1. In Telmai, run a scan on an asset that has a mapping

  2. After the scan completes, open the mapped table's catalog page in Alation

  3. Check the Telmai Observability field on the table — it should now show the data quality results from the scan

From this point on, the field is refreshed automatically after every scan of the mapped asset. If the field is empty, verify that the asset is mapped (Step 3) and that at least one scan has completed since the mapping was created.


API Reference

All Alation integration operations are also available via API. See Alation Integration APIs for the full reference.

Last updated