For the complete documentation index, see llms.txt. This page is also available as Markdown.

Managing Assets

The Asset Manager is the central place to view, filter, and manage all of your assets. From here you can search for individual assets, run or schedule scans, move assets between projects, configure monitors, and inspect each asset's scan configuration and lineage.

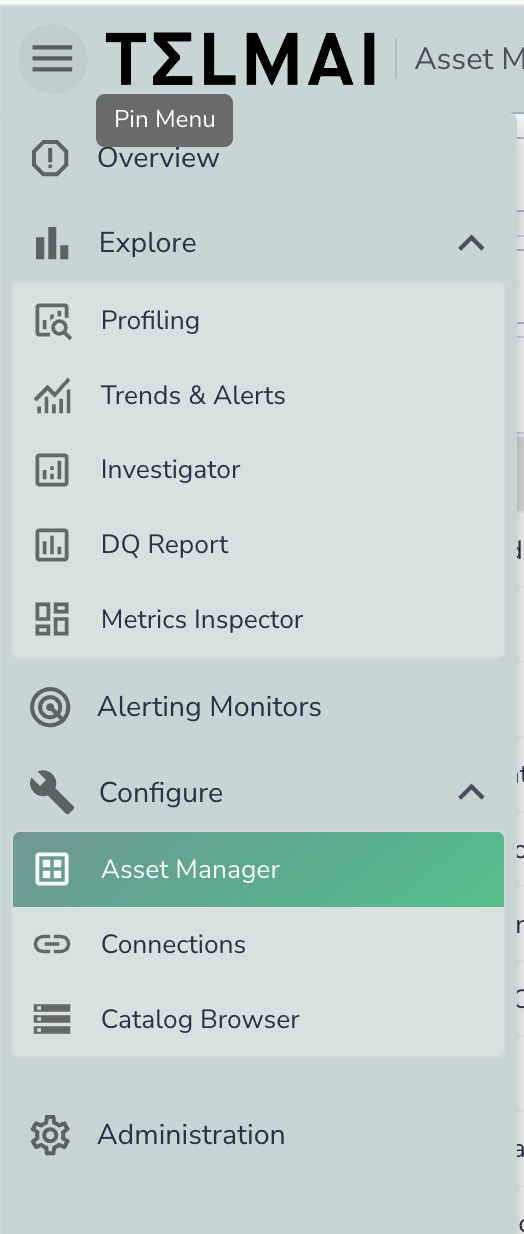
The Asset Manager is the newer assets experience. Navigate to Asset Manager page using the left-side menu.

Note: This feature is disabled by default. To enable it, navigate to Administrator page and enable Show Asset Manager page toggle

The left-side menu with Asset Manager highlighted under Configure
Open the Asset Manager from the left-side menu.
Finding Assets

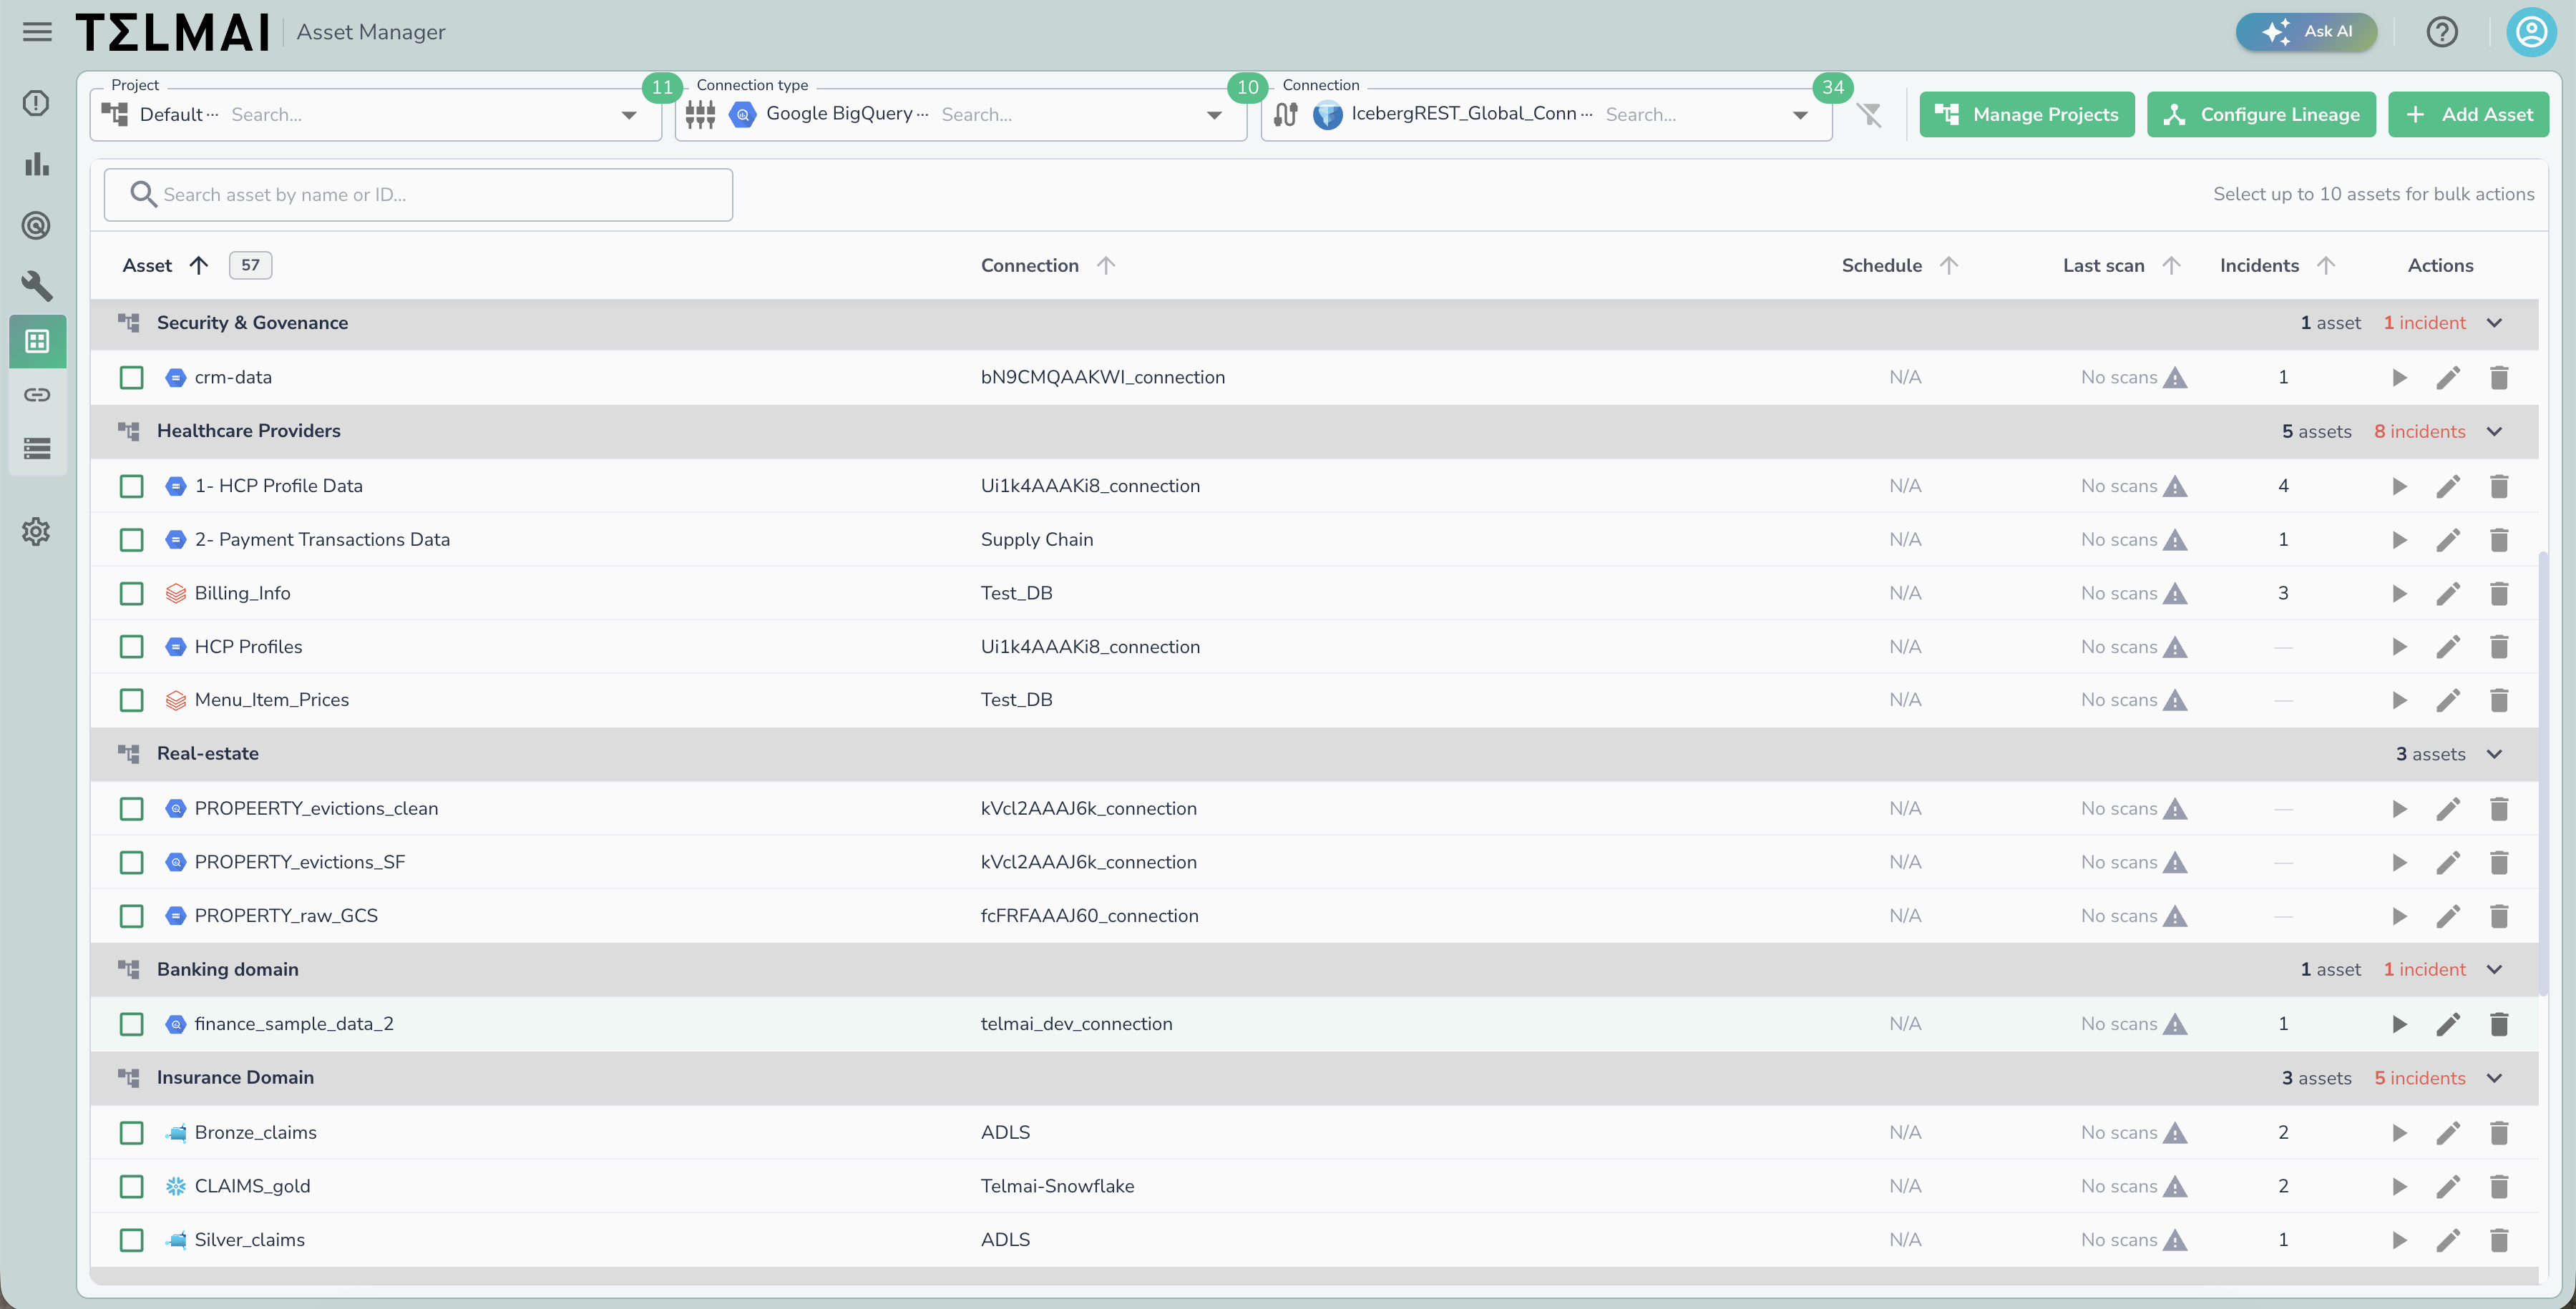
Use the filters at the top of the page to narrow down the asset list:

  • Project — filter assets by the project they belong to.

  • Connection type — filter by connection type (for example, Redshift, Athena, Azure).

  • Connection — filter by a specific connection.

  • Search — use the Search asset by name or ID box to find a specific asset.

The Asset Manager page with filters at the top and assets grouped by project
The Asset Manager page, with assets grouped by project.
Assets are grouped by project, and each project group shows a summary of how many assets and open incidents each asset contains. The asset table includes the following columns:

Column
Description

Asset

The asset name and its source type icon.

Connection

The connection the asset belongs to.

Schedule

The asset's scan schedule, or N/A if no schedule is set.

Last scan

When the asset was last scanned. A green check indicates a successful scan; a red indicator marks a failed scan or one with incidents; a warning icon indicates the asset has never been scanned.

Incidents

The number of open incidents for the asset.

Actions

Per-asset actions: run a scan, edit the asset, or delete it.

Adding and Managing Assets

  • Add Asset — add a new asset to the selected connection.

  • Manage Projects — create and organize the projects used to group assets.

  • Configure Lineage — set up lineage relationships between assets.

Bulk Actions

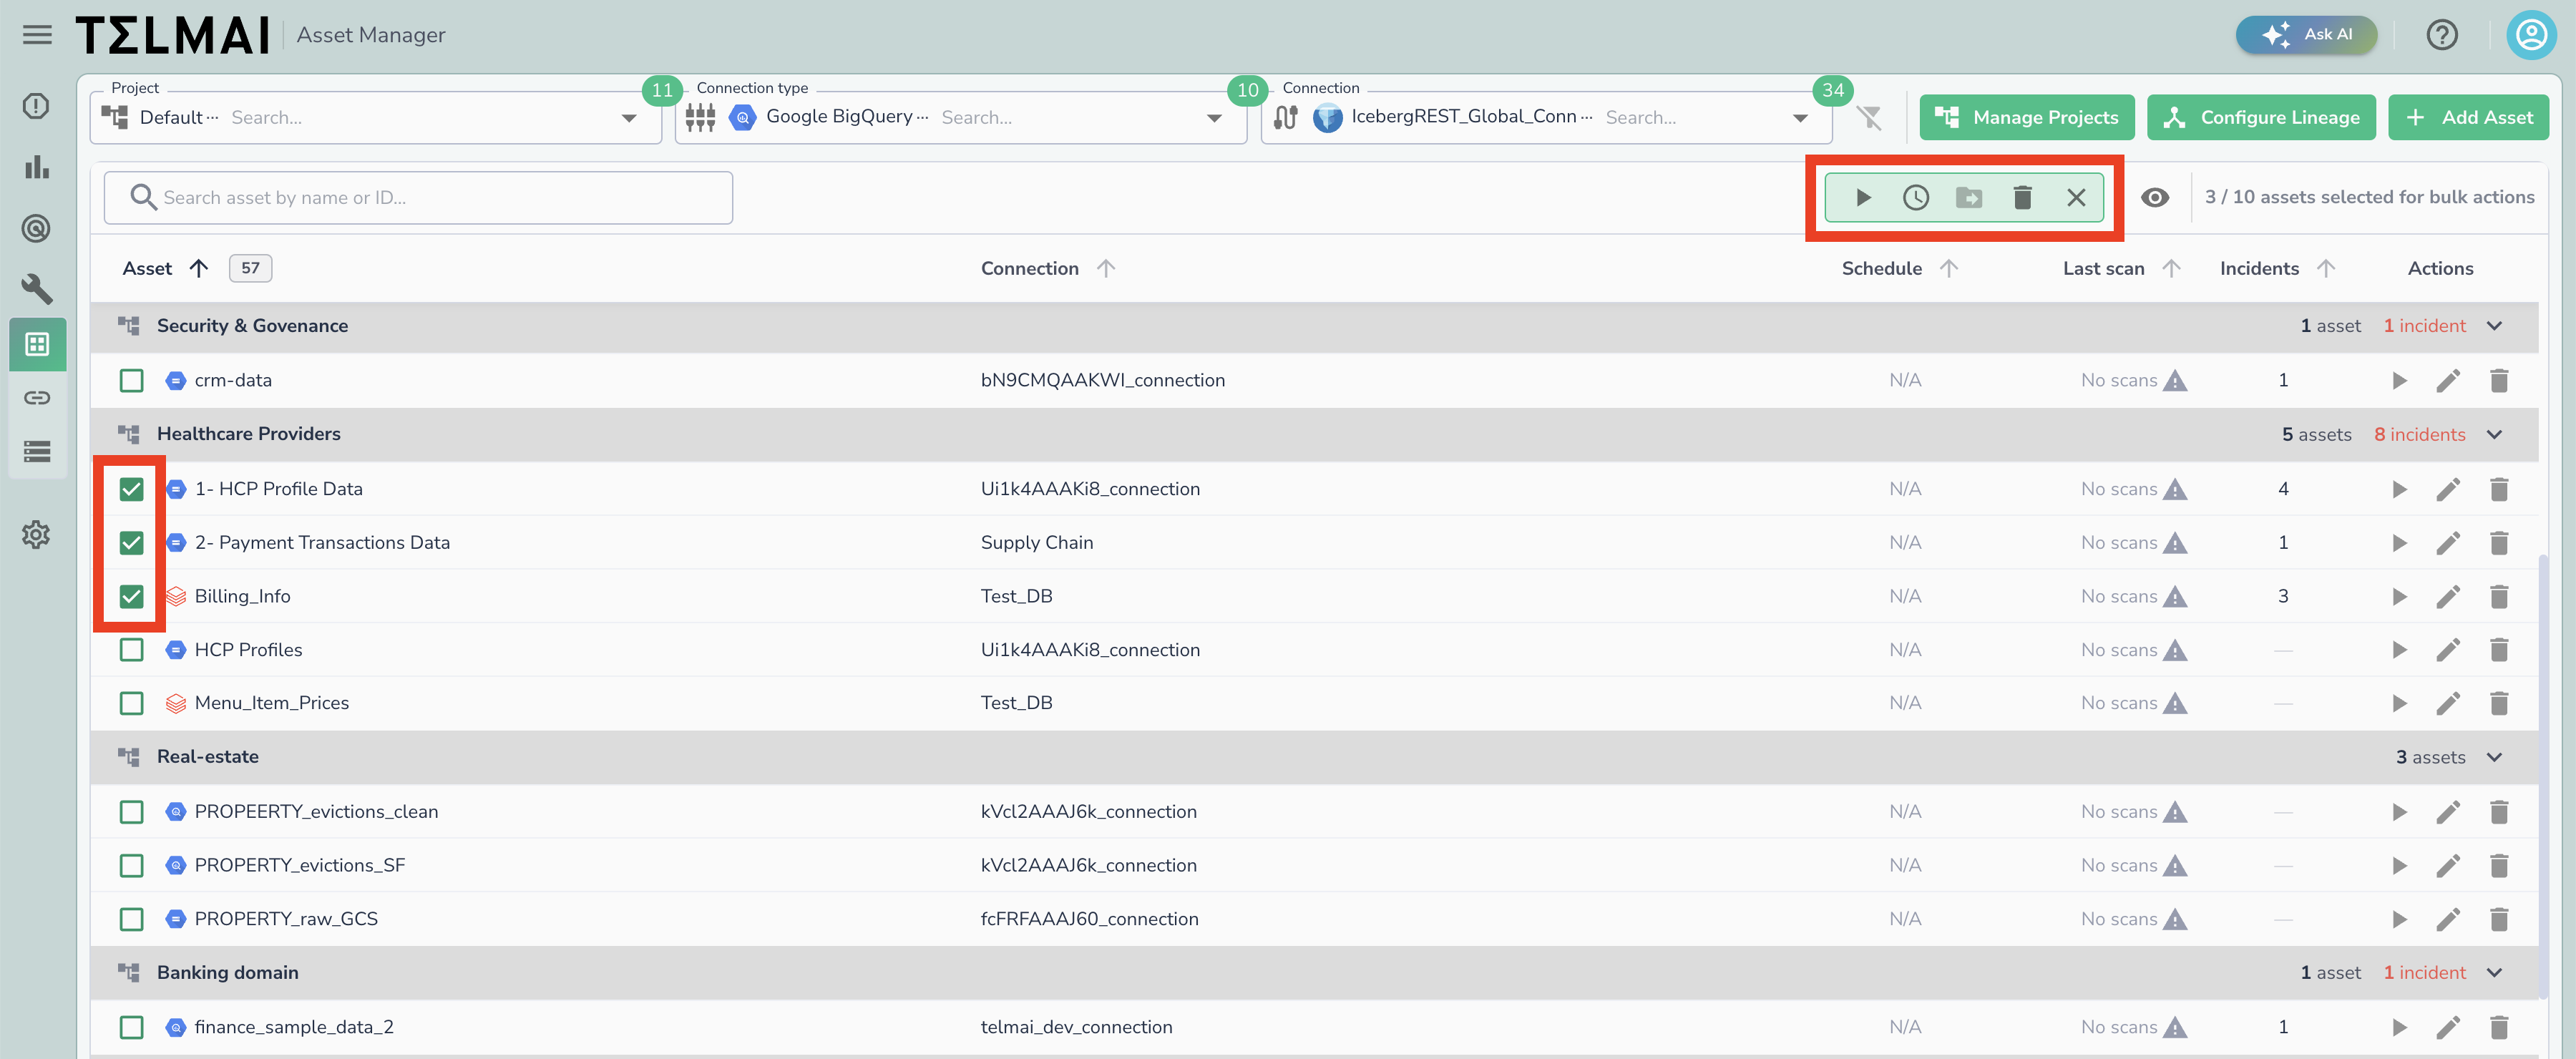
Select assets using the checkboxes in the asset list to perform actions on multiple assets at once. You can select up to 10 assets for bulk actions. Once one or more assets are selected, a bulk action toolbar appears above the list with the following options:

  • Start scan — trigger a scan for all selected assets.

  • Schedule — set or update a scan schedule for all selected assets.

  • Move project — move all selected assets to a different project.

  • Delete — delete all selected assets.

The bulk action toolbar shown above the asset list with three assets selected
The bulk action toolbar appears above the list once assets are selected.
Asset Details

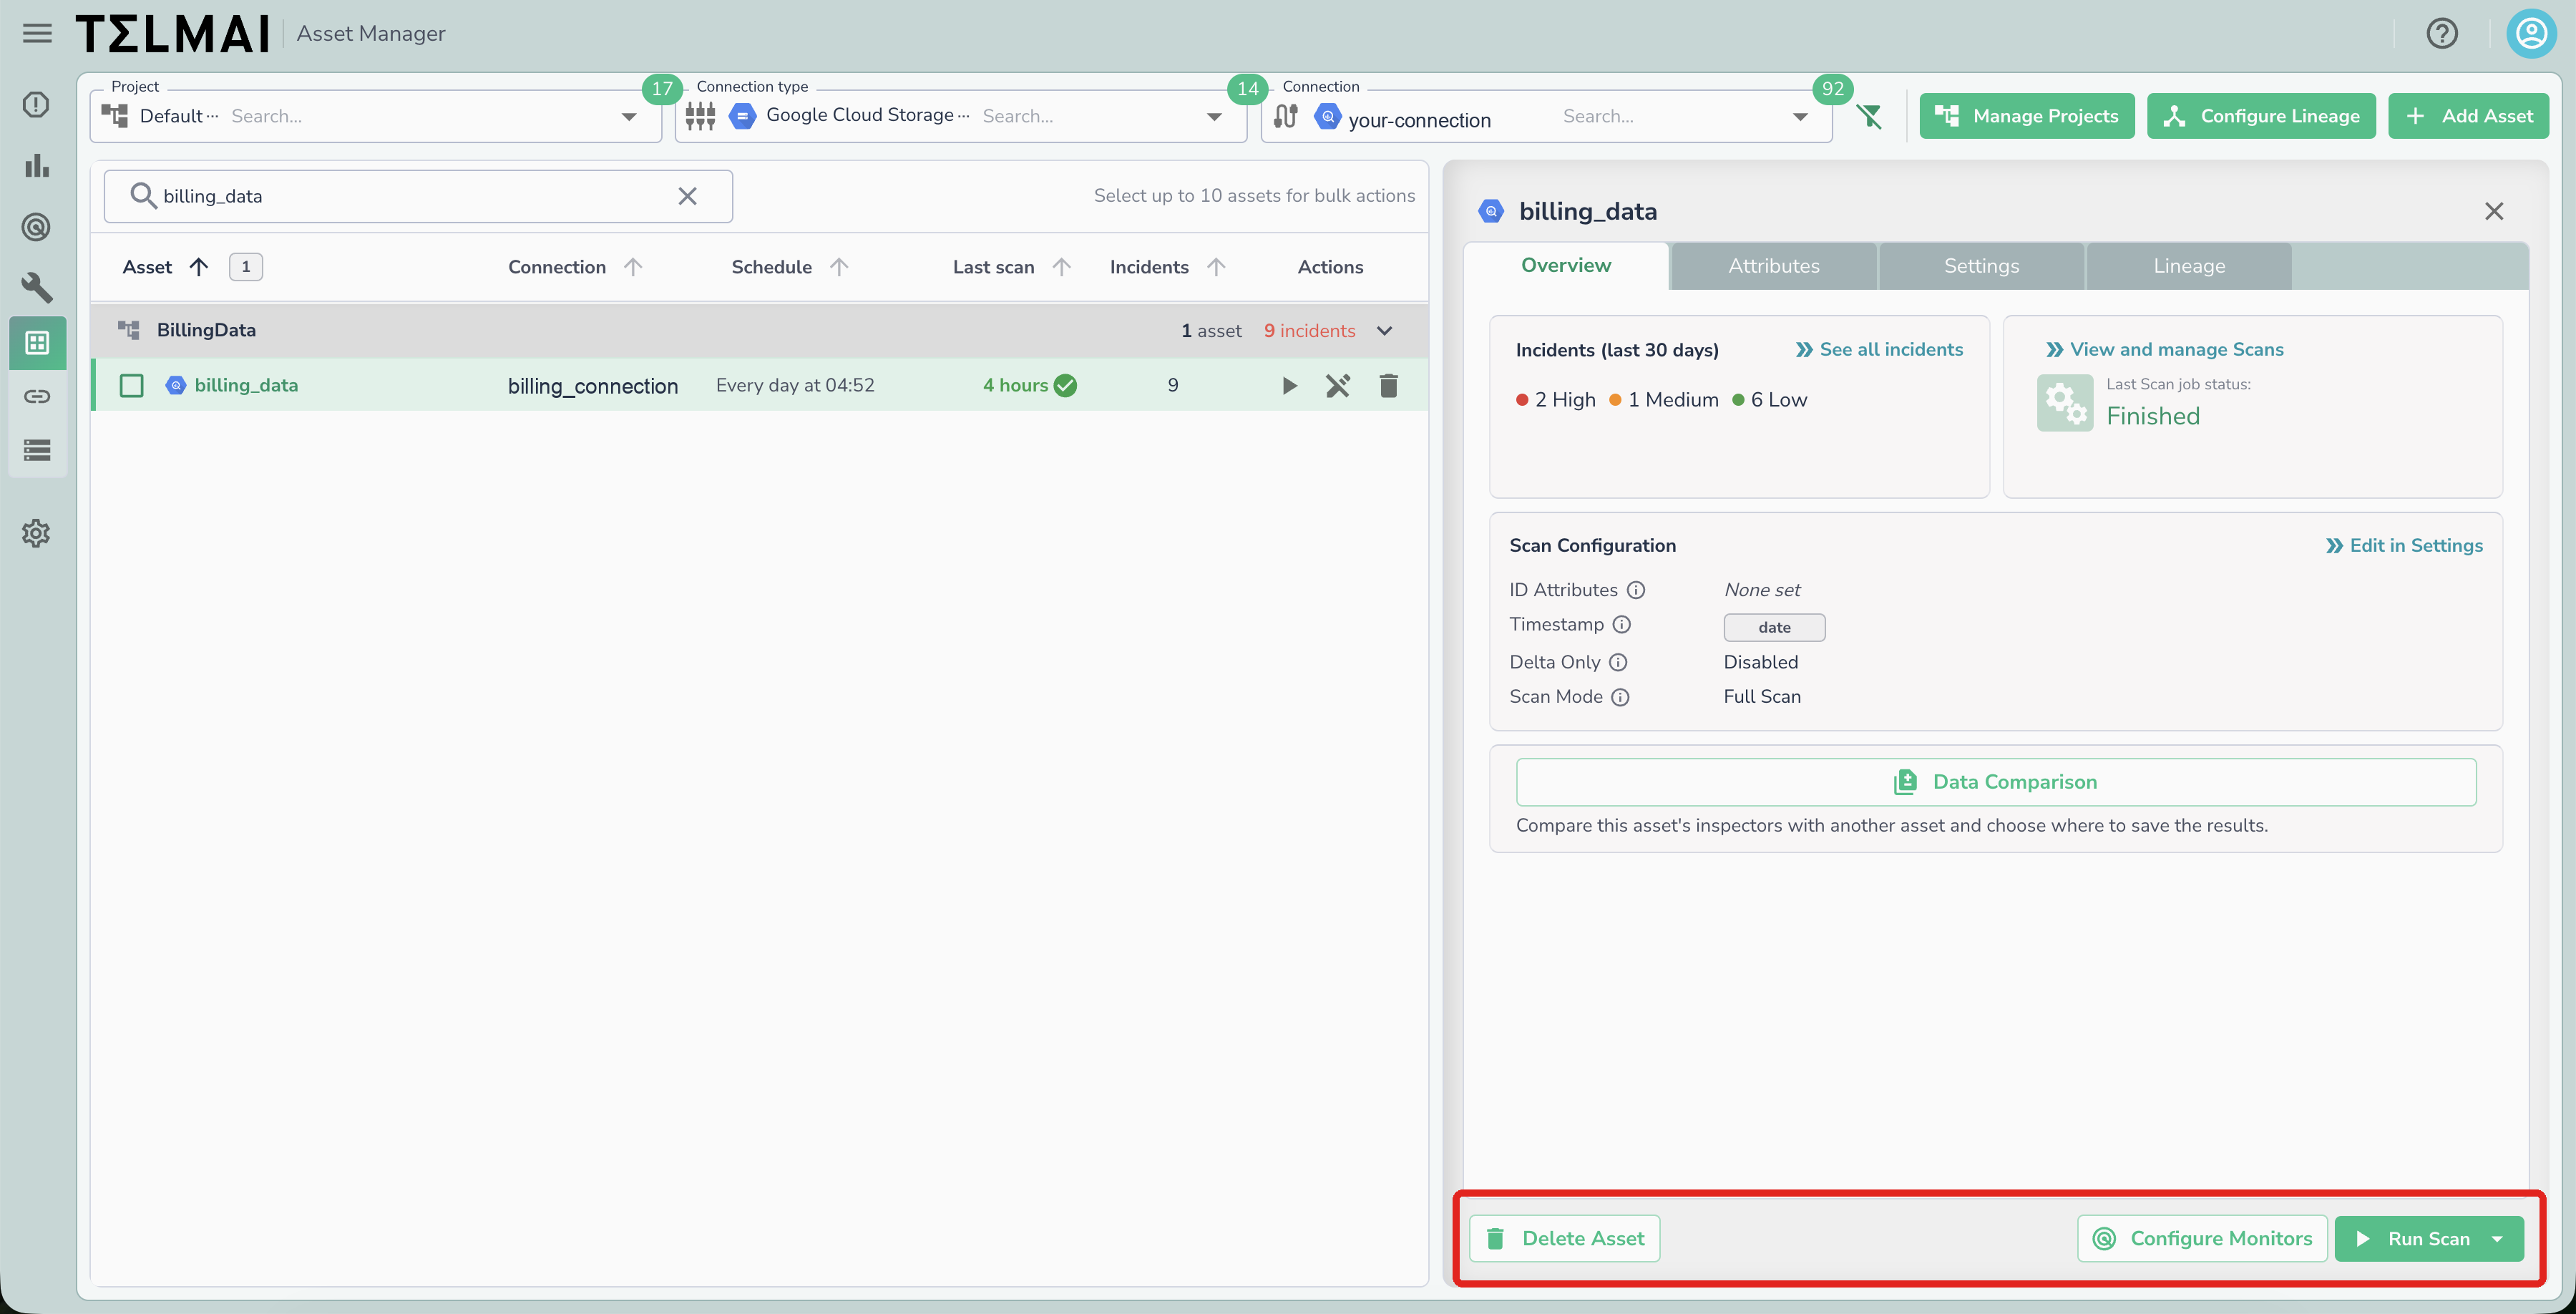
Selecting an asset opens a details panel with the following tabs:

  • Overview — shows incidents from the last 30 days, the status of the most recent scan job, and the asset's scan configuration (ID Attributes, Timestamp, Delta Only, and Scan Mode). You can also start a Data Comparison to compare this asset's inspectors with another asset.

  • Attributes — view the asset's attributes.

  • Settings — edit the asset's scan configuration and other settings.

  • Lineage — view the asset's lineage relationships.

From the bottom of the panel you can Delete Asset, Configure Monitors, or Run Scan.

The asset details panel showing the Overview tab with incidents, scan status, and scan configuration
The asset details panel, showing the Overview tab.

Last updated